
Creation Of Email Template
Email Templates are designed for consistent mails so as to increase productivity of the respective organization or company. It allows us to send email using predefined templates. These Email Templates can be used in automation with email action or while sending email manually to the company.
There are four types of Email Templates
- Text
- HTML (using Classic Letterhead)
- Custom (without using classic Letterhead)
- Visualforce
1. Text –: All the Users can create or make changes in the text Email Template.
2. HTML (using classic Letterhead) -: This is created by only Administrators and users with the help of pre-defined HTML email templates. The HTML email Templates can inherit the various logos, colors, and text formatting from a letterhead.
3. Custom (Without using classic Letterhead) -:This type of mail template is created by Administrators and users but the difference is that Here the user should have some basic Idea of HTML code or obtain an HTML code to insert in your email template.
4. Visualforce -: Here the Administrators and developers create the Email Templates with help of advanced features and merging various data and records.
Steps to be followed while creating a TEXT Email Templates
Step 1. Sign In yours org.
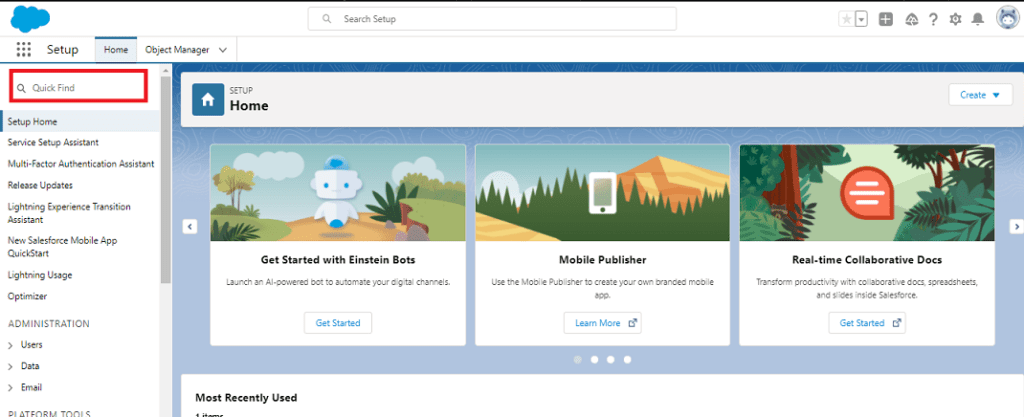
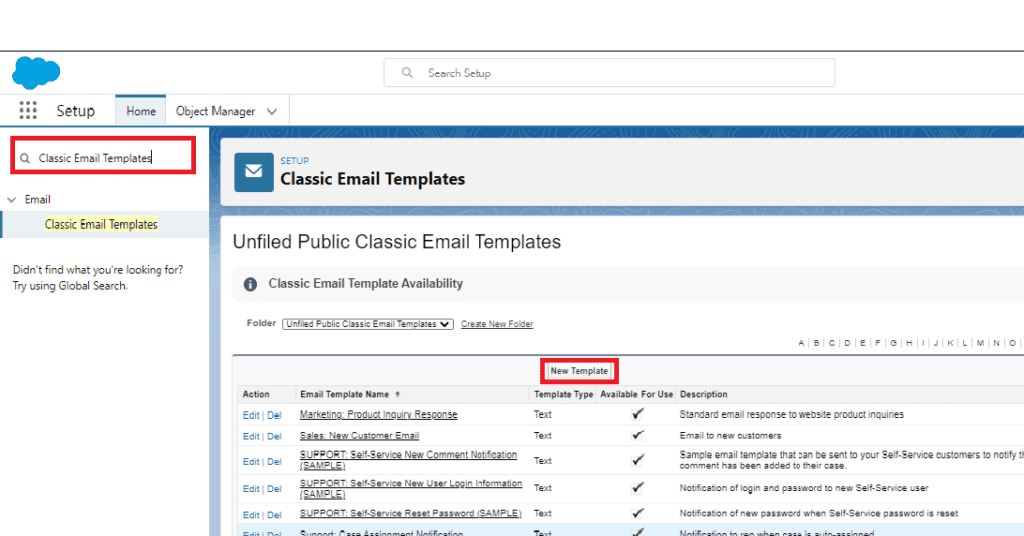
Step 2. In Quick Find Box Search for Classic Email Template.
Step 3. Click on “New template”.
Step 4. Select the type of Email Template, here we are using Text as an Email Template.
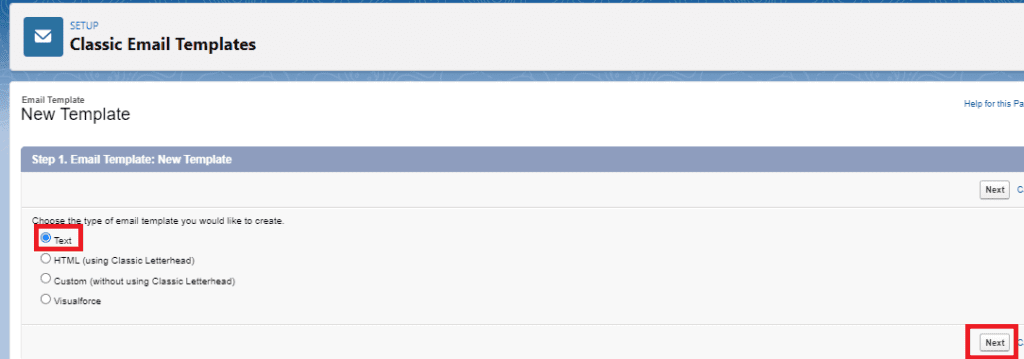
Step 5. We will select Text and proceed further by clicking on Next.
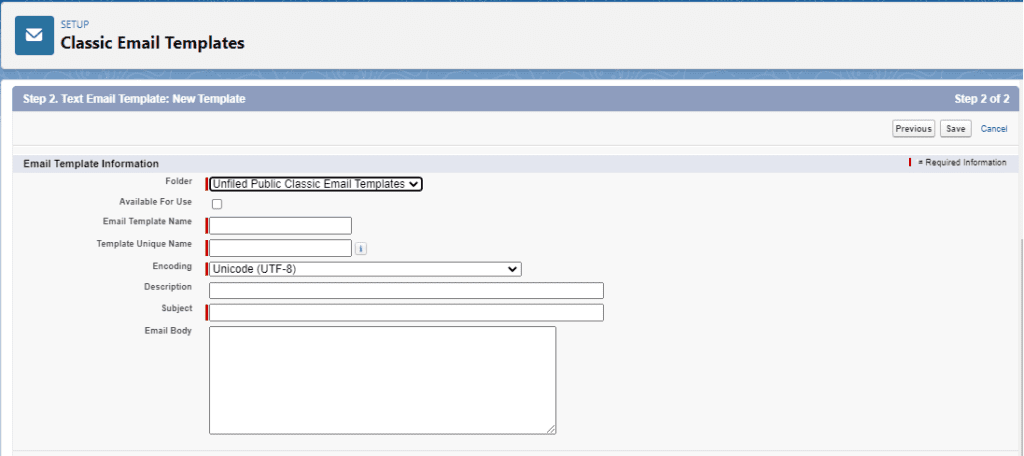
Access to the Email Template is controlled by folders. There are two folders that is available in the org:
1. My Personal Email templates – Under this folder Only the Report Creators /Owner only Access this Email template.
2. Unfiled Public Classic Email Template – This folder is the public folder means everyone can Access this Email te mplate.
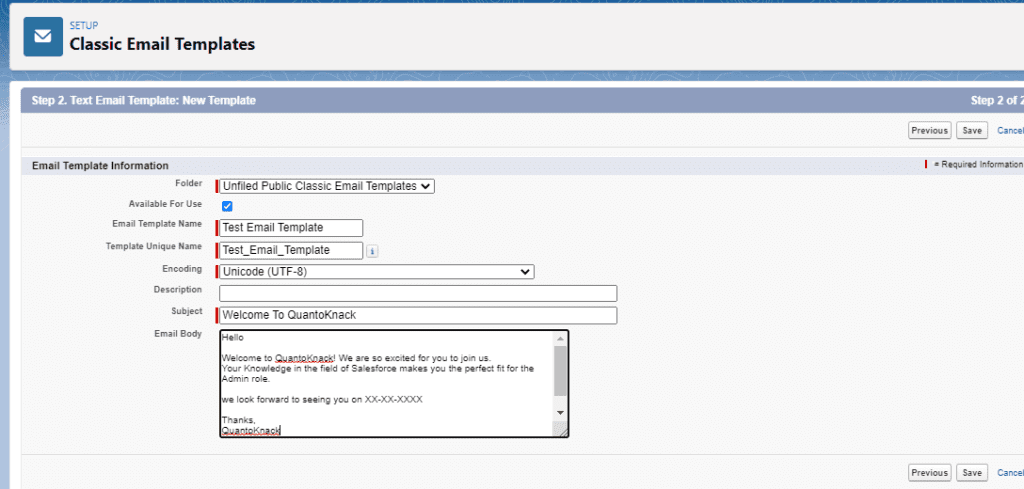
Step 6. Select the folder and tick the Available for Use checkbox.
Step 7. Fill in all the fields which were asked such as Email Template name, Description, subject, and Email Body. As shown in the screenshot.
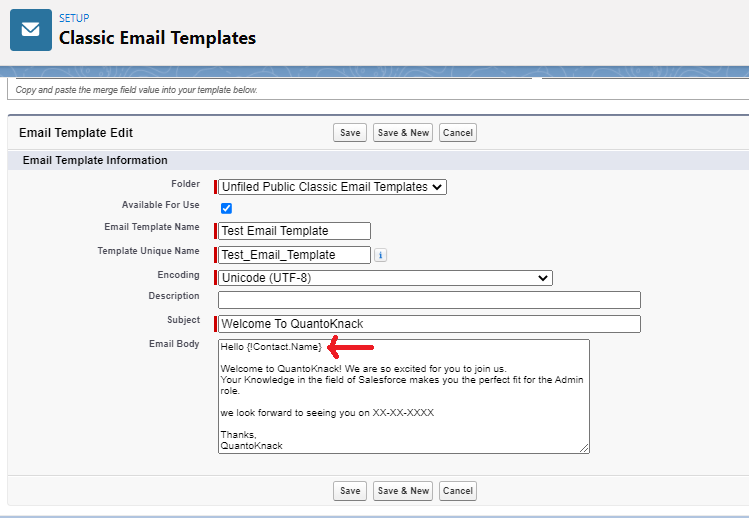
Let’s assume a scenario where we need to send a Welcome mail to various Contacts by their respective Name, for that we need to follow these steps to create a mail merge within the email template.
Step 9. Copy the merge field value and paste it on the template where the name is to be displayed, it will be clearer through Screenshot.
Step 10. Click on “Save”.
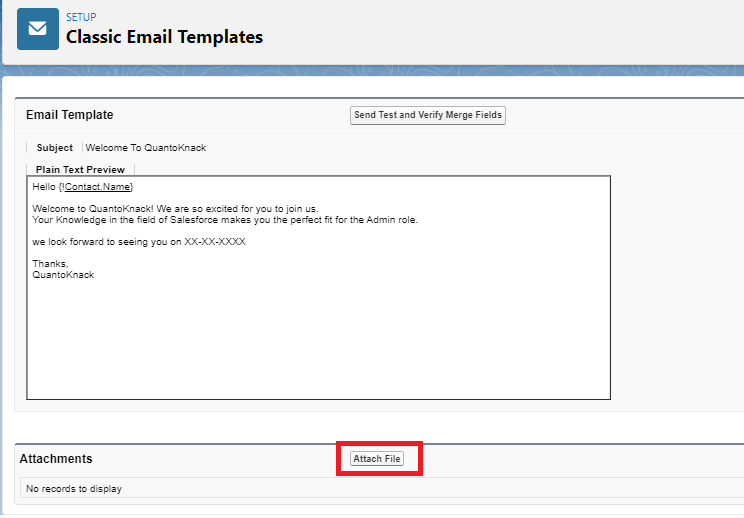
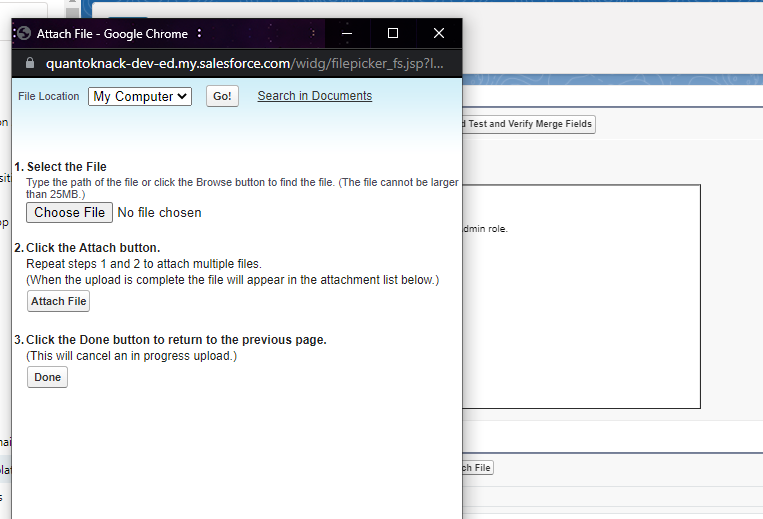
Step 11. To add any attachment we can use the “Attach file” button and upload the desire file.
Step 12. Now we have to Check our email template is working or not. We test by filling All the details i.e., Selecting the Contact > John Dev > Email (Email is changed instantly for the testing purpose). Click Ok
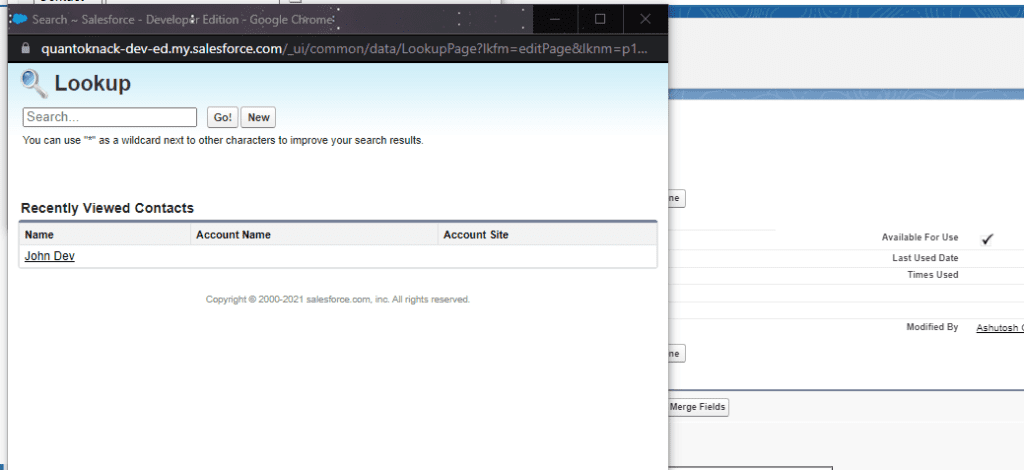
Step 13. The mail has been sent to the registered mail id which is given.
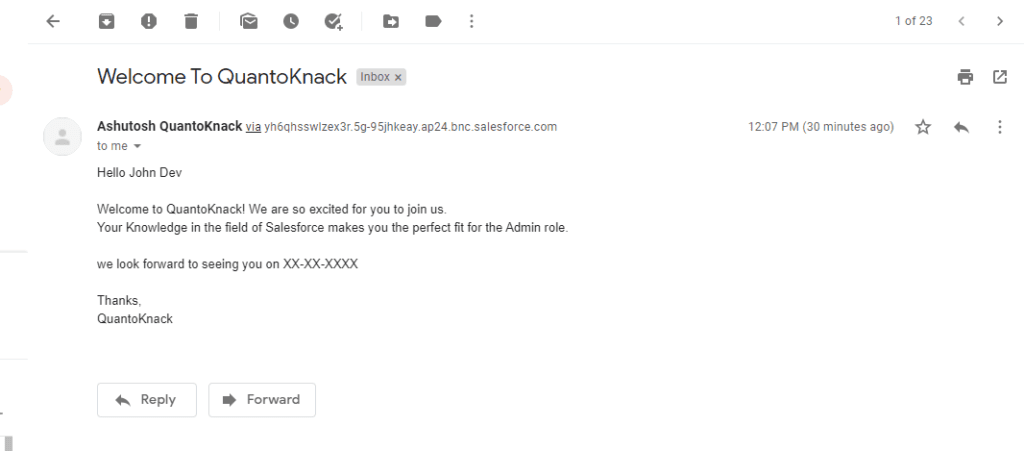
We have learned how to create an Email Template for an organization/company through Text and cross-verified it.
Happy Learning
Written By: Ashutosh Tiwari


