Since the Spring ’18 release, Salesforce has been trying to get users to migrate to Microsoft Visual Studio Code (VS Code) with the retirement of the Force.com IDE Eclipse. So, if you haven’t heard of VS Code yet, now is the time to learn about it.
Visual Studio is a lightweight, user-friendly, and comprehensive IDE with built-in support for Salesforce and Git. It has keyboard shortcuts, debugging assistance, and other capabilities such as syntax highlighting and code completion. All of these things may make your life as a developer a lot simpler.
The best thing is that Salesforce includes its own VS Code extension pack to make the IDE Salesforce compliant. The package contains eight extensions, all of which can be downloaded and installed in your IDE with a single click.
In this tutorial, we’ll look at the capabilities of VS Code, how to set it up, and how to utilize it as a powerful tool for Salesforce development.
Do you want to learn Salesforce concepts firsthand? Enroll in QuantoKnack’s Salesforce admin training in Dallas to gain a wide understanding of customizing & configuring Salesforce on a regular basis, managing users, and searching for methods to get even more out of its features capabilities.
Why Visual Studio Code For Salesforce Development?
VSC(Visual Studio Code ) is one of today’s most well-known editors. It is an open-source editor, which makes it more attractive to developers, has a built-in git client, and is lightweight. This is all we want and need. However, the biggest benefit of VSC over Eclipse (and other editors) is speed.
VSC is easily extensible using extensions. To summarise, it is designed to save you time and make you more effective.
Prerequisites
Before we jump to the installation and configuration section of Visual Studio, it’s essential to understand some perquisites.
Get ready with the following things:
- Salesforce Developer Account (https://developer.salesforce.com/signup) Download and install Visual Studio Code (.exe)
- Download & install the CLI (Command Line Interface).
- Salesforce Add-On Pack (Extension from Visual Studio Code) Install via Visual Studio Code.
Learn To Set Up Visual Studio Code For Salesforce Development
Visual Studio Code is the most recent IDE for Salesforce Development, and in this section, we will help you learn how to set it up for Salesforce Development. So, let’s get started.
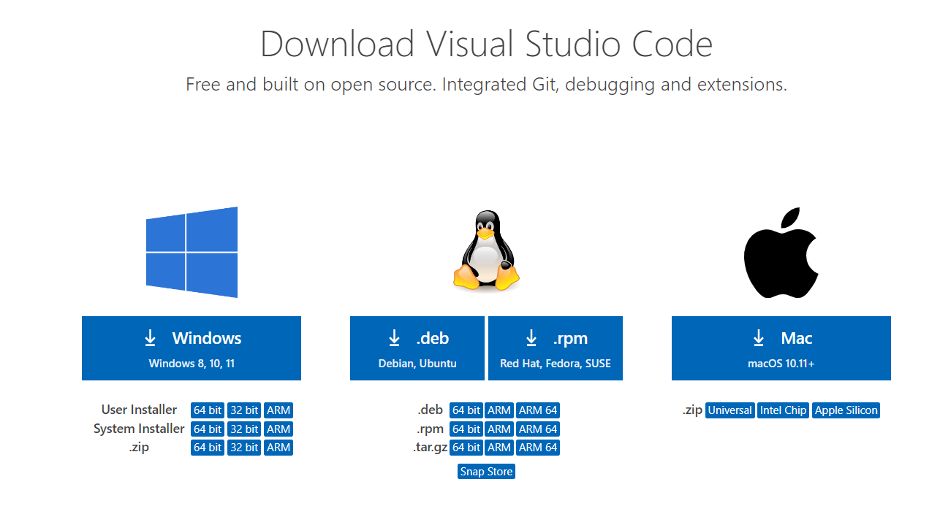
Download Visual Studio Code
The first step in starting with Salesforce development is downloading and installing the VS Code IDE. You may get the most recent version of VS Code here.

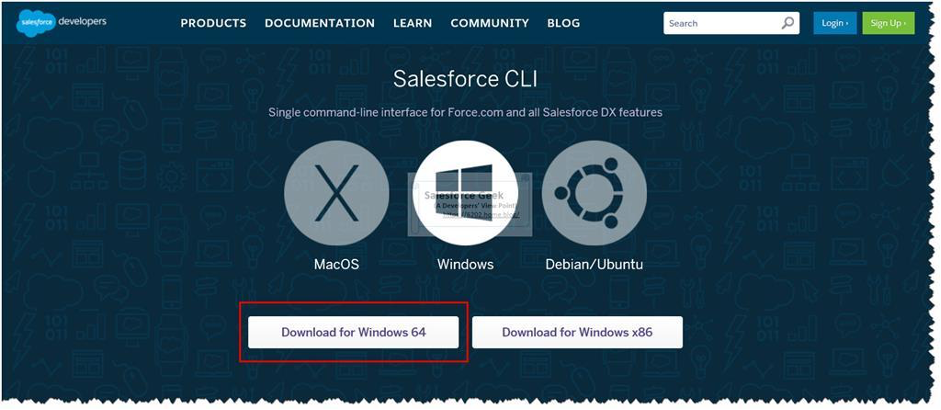
Install SFDX Command Line Interface
As previously stated, you must install the Salesforce Extension Pack in order to utilize VS Code for Salesforce development. However, you must first install the Salesforce DX Command-line Interface (SFDX CLI).
SFDX CLI is a highly strong tool that may greatly ease your development experience. You may also use it to establish automation while dealing with your organizations. Bid adieu to the Force.com IDE, and welcome to Visual Studio Code.
It can handle the following vital tasks:
- It can consolidate and save all of the commands and tools required for Salesforce development in one location.
- It may be used to sync your organization with the source and vice versa.
- SFDX CLI also makes it easy to install additional packages.
- It may be used to manage both organizations and data.
- It can be used for testing reasons. The best part is that it is open source, which makes it extremely adaptable.

After that, click here to obtain the SFDX CLI for your operating system. Run the sfdx command in your terminal to see if the SFDX CLI is properly installed.
Install Salesforce Extension Pack
Salesforce has released its own extension bundle for developers. When you launch your VSCode IDE, go to the left sidebar menu and select the fourth icon for maintaining extensions. Look for Salesforce Extension Pack and select the top result.
As of currently, the extension pack includes the following extensions, which will be enabled immediately when you install it:
- Apex
- Apex Interactive Debugger
- Apex Replay Debugger
- Salesforce CLI Integration
- Aura Components
- Visualforce
- Lightning Web Components
- SOQL
- SLDS Validator
Create Project
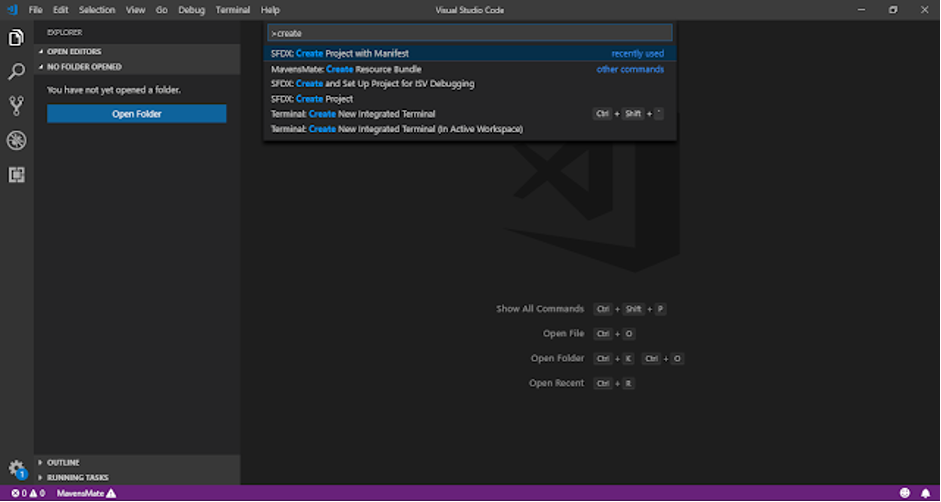
Congratulations! Your software installation is finished up to this point. It is now time to start your first VsCode project. To begin, open the Command Palette or press Ctrl + Shift + P. Then put SFDX: Create Project using Manifest into the search box.
SFDX: Make a Project Using Manifest
Then provide your project name and choose a place to store your project.
You will see an empty folder structure in VsCode until this moment. Let’s examine how we can integrate VsCode with Salesforce.
Connect to your Salesforce Organization

Now that our project is complete on the local PC, it is time to link VsCode to Salesforce. Open the Command Palette again, or click Ctrl + Shift + P. This time, you must input or choose “SFDX: Authorize an Organization.”
Then it will ask you to select the environment in which we need to join.
The org alias name must be provided in the final stage. It will then redirect you to your regular browser and prompt you for your org credentials. If you are requested to grant access, click Allow.
Until this moment, your Salesforce org is connected to VsCode. It is now time for development.
Retrieve Component

Do you have to extract all of your Salesforce components into VsCode now?
There are two ways to accomplish this: one uses the manifest file, and the other leverages the org browser. Let’s have a look at both ways.
- Metadata Retrieval from the Org
- After successfully configuring your project and connecting it to your org, you will see Visual Studio Code workspace.
- This allows you to view all of the metadata in your organization. When you hover over a metadata item, a symbol looking like a cloud with an arrow appears to the right of it. You may import the information into your project by clicking this icon.
- Retrieving Metadata using the manifest package.xml file
- Before we begin, an addon called “Salesforce Package.xml Generator” will greatly simplify the process of creating these package.xml files.
- This technique is quite handy if you want to constantly retrieve from your organization into your projects. In some instances, it’s also significantly quicker than the org browser.
To use this technique to retrieve metadata, perform the following steps:
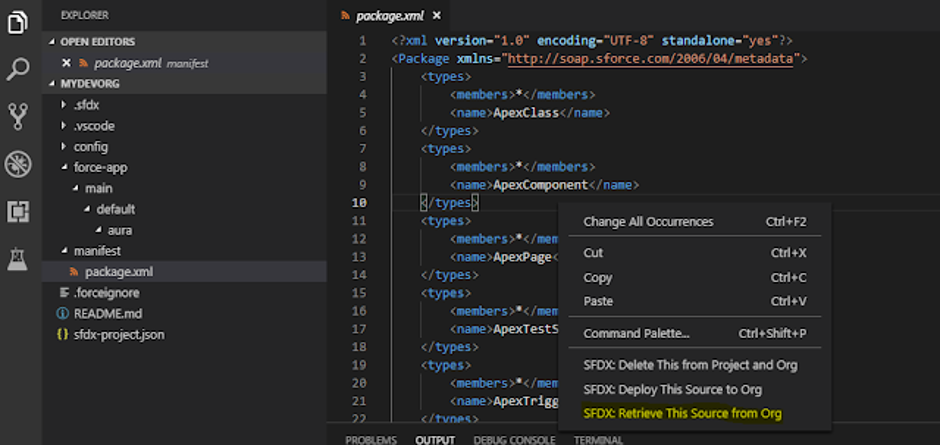
- You should find a “manifest” folder in your project. There needs to be a file called “package.xml” in that folder. You may either ignore it or modify the package.xml file to add additional metadata types to retrieve from your organization. In the following step, you will only retrieve data types defined in your package.xml file.
- In the command palette, execute the command SFDX: Retrieve Source in Manifest from Org. This should import all of the metadata from your organization that you specified in your package.xml file.
Other Useful Things To Set Up
The things mentioned above are the only ones necessary to get started. However, the items listed below will make your life a lot easier.
How to Enable Auto-Complete for Object Fields
- Run the SFDX: Refresh SObject Definitions command in the command palette to enable autocompletion on your object fields.
- Do the following if you wish your SObject definitions to update every time you open your VSCode project automatically:
- Go to Settings (File -> Preferences -> Settings).
- There is a checkbox for “Enable-object-refresh-on-startup” in the extension settings under “Salesforce Apex Configuration.” When your project is loaded, this automatically updates your organization’s objects.
How to Auto-Deploy to your org to save
If you didn’t already know, it would not automatically deploy to your org whenever you save your code. You must right-click on your project’s file and pick the option to deploy the code to your organization. Follow these steps to enable auto-deployment:
- Open VSCode and navigate to File -> Preferences -> Settings.
- Select Extensions from the drop-down menu.
- Select the Salesforce Feature Previews extension from the list.
- Tick the “Push-or-deploy-on-save” box.
- If you utilize the auto-deploy on save function, you also need to enable the “Detect Conflicts At Sync” feature preview in settings. By activating this, you will be notified if your save contains any conflicts with other developers’ code before you deploy it to your organization.
That wraps up this tutorial. Give it a shot and let us know in the comments whether you’re able to utilize VS Code for your development activities and if you run into any problems when carrying out the above steps.
Do you want to learn how to configure Salesforce and other processes? Enroll in QuantoKnack’s Salesforce Admin course and Salesforce Developer training. We provide live, instructor-led Salesforce admin training that is designed to lead you through the learning, certification, and job search process of launching a Salesforce career.
Our industry-professional mentors guarantee that you get the required information, hands-on experience, and skill set to jumpstart your Salesforce career.
After completing our Salesforce Admin training or QA training course, you will be able to enter the job market and get significant experience as a working professional in the business.
Register now and go one step closer to your dream Salesforce career!


